One feature which really let down the Diablo was the rather nasty plastic nut. I’m into compensated nuts at the moment, so I fitted one here.
I recently had a rather unpleasant experience where some anonymous idiot who had never seen any of my guitars, never met me or even spoken to me decided to make some very vigorous claims that I didn’t know how to fit a nut, dress a nut or set the nut string height. He was exceptionally rude. I dismissed him as a ranting fool, but just in case he resurfaces, I’ve decided to document very clearly the way I replace a nut. There are other ways, but this works for me.
This technique is the same for conventional and compensated nuts.
Fitting and cutting a nut is probably the trickiest and most critical part of a build for me. A badly-cut nut can ruin a perfectly good guitar by creating rattles and a stiff action. It can even cause the guitar to play out of tune. Consequently I take it very seriously and have a selection of special tools to help me get it right:

I’d put money on my internet friend not having this little lot.
First job is to knock the stock nut off. Usually they come off quite cleanly but this one took a bit of the wood with it. I was able to salvage the bit which came off and glue it back in place.
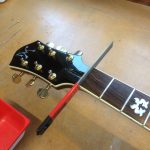
Next I cleaned up the area where the nut will sit with a special file. This one is the correct width for a Fender nut, but it works perfectly well here. If the nut isn’t sitting on a perfectly flat surface it affects the transfer of the string vibration into the neck, so this part is pretty important.

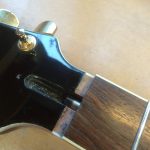
The nut was glued into place next. I’ve found that Cyanoacrylate (Super Glue) works best. These compensated nuts overhang the fretboard slightly. Sometimes they sit a bit high and need filing down. This one was exactly the right height. It’s slightly wide, but that’s OK – it will be dressed back later. It isn’t quite as deep as the original nut, though, and there’s a gap between the nut and the headstock facing. If this was a customer’s guitar I would put a shim of ebony in there to fill the gap. However it’s my own guitar and I want to get on with playing it! The truss rod cover will hide most of the gap anyway.
Now comes the tricky bit – setting the nut slots.
The string needs to sit in the nut so that it’s just higher than the frets. We are talking a tiny amount here – I use 0.25mm as my starting point. If the slot isn’t deep enough you have to press down too hard at the first and second frets and you can bend the string out of tune. No matter how low you wind the bridge, the action at the nut end is always high and unpleasant to play. Obviously if the slot is too deep the string touches the first fret.
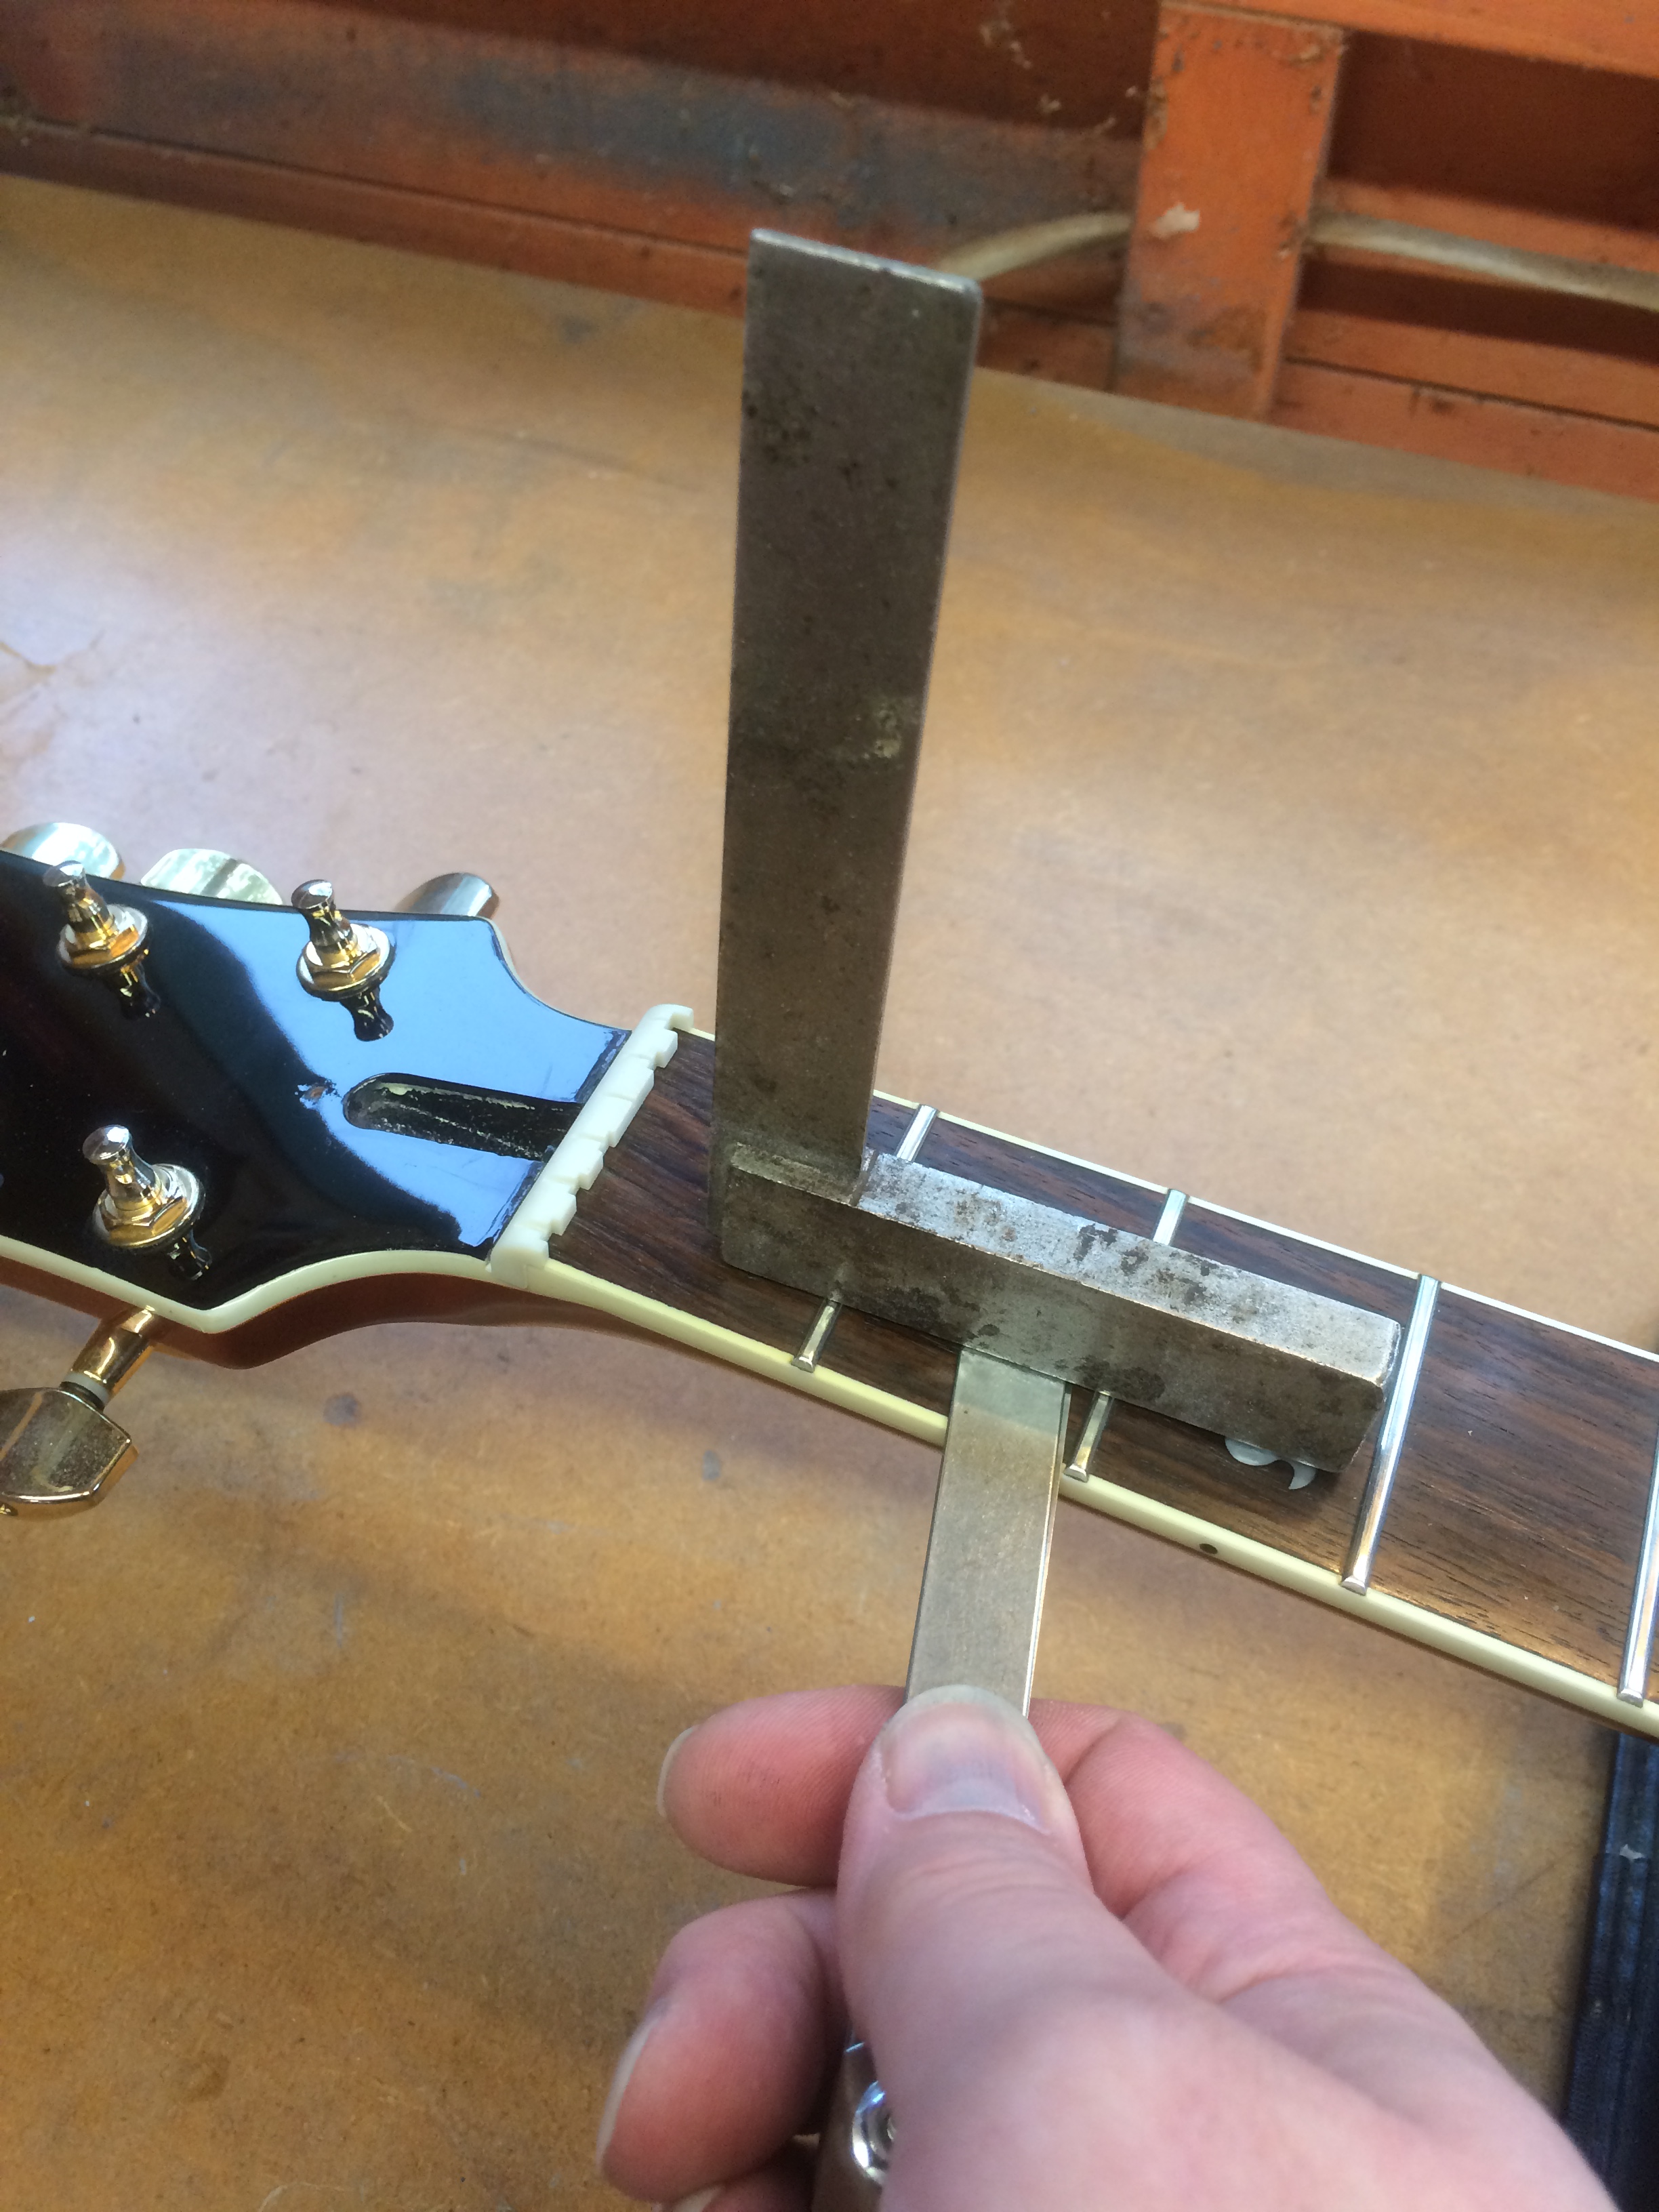
In the photo above I’m using feeler gauges to measure the gap between the fretboard and the straight-edge across the frets. I’m using an engineer’s set square as my straight edge, so it should be pretty accurate even if it is a bit grubby.
Once I’ve measured in a few places and confirmed the height of the frets, I add another 0.25mm to the stack of feeler gauges. For example, if I measured the frets as 1.25mm high, I want a total of 1.5mm of feeler gauges for the next step.
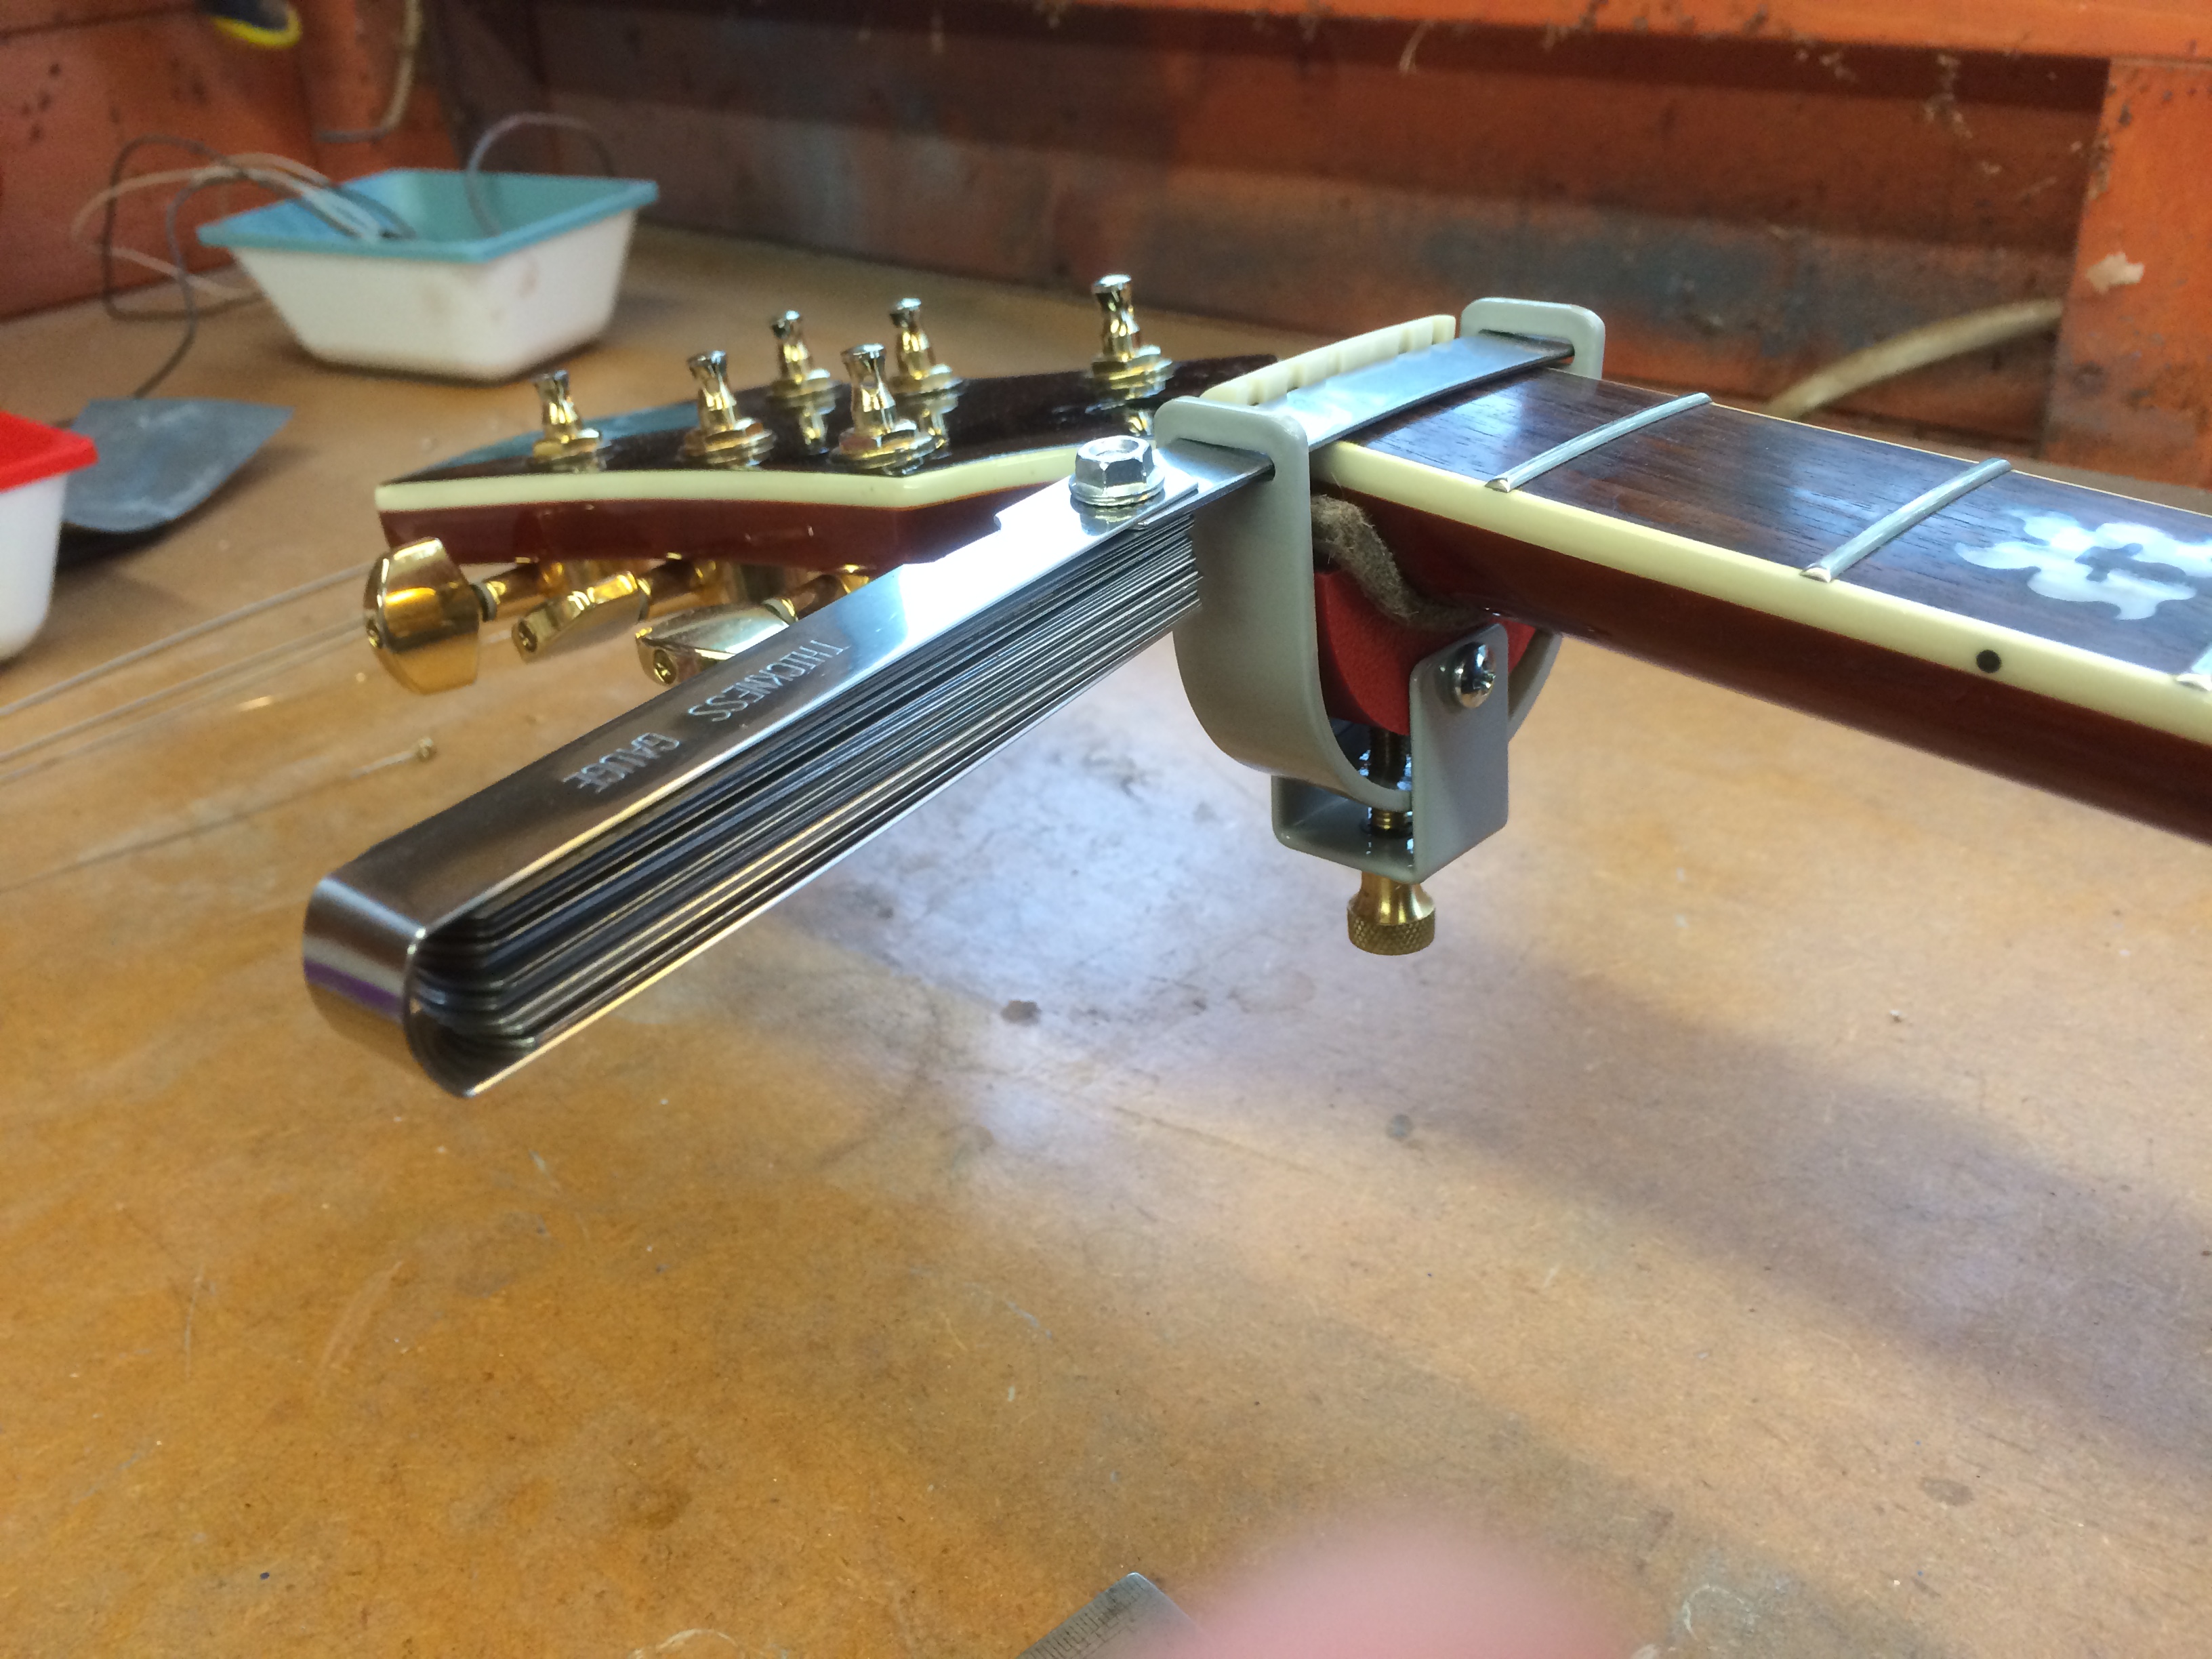
Here’s the clever bit. I’ve got my stack of feeler gauges that’s fret height + 0.25mm, and that’s going to act as a depth stop for my nut file. I file down until the file touches the feeler gauge, and I know then that the bottom of the slot is 0.25mm higher than the frets. I used to just hold the feeler gauges by hand, but I’ve now got this rather Gucci clamp, a bit like a capo, which holds the feeler gauges in place for me.

Here’s the fret file, magically balancing in the slot. Don’t ask how long it took to set that shot up! The files are double sided – make sure you’ve got the correct size for the slot you are cutting. I stop the instant the file hits the feeler gauge. These files are expensive and are not designed to cut metal!
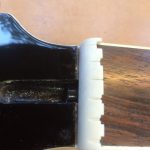
At this stage the nut usually looks a bit rough. It’s too wide and the slots look like canyons. That’s fine. The manufacturers give us a bit more materiel than we need as it’s easy to take it off but you can’t put more on. The slot doesn’t need to be all that deep – for the wound strings about half the string should be under the surface. Just enough to stop them popping out of the slot. If the slot is too deep it can cause tuning issues and it looks naff.
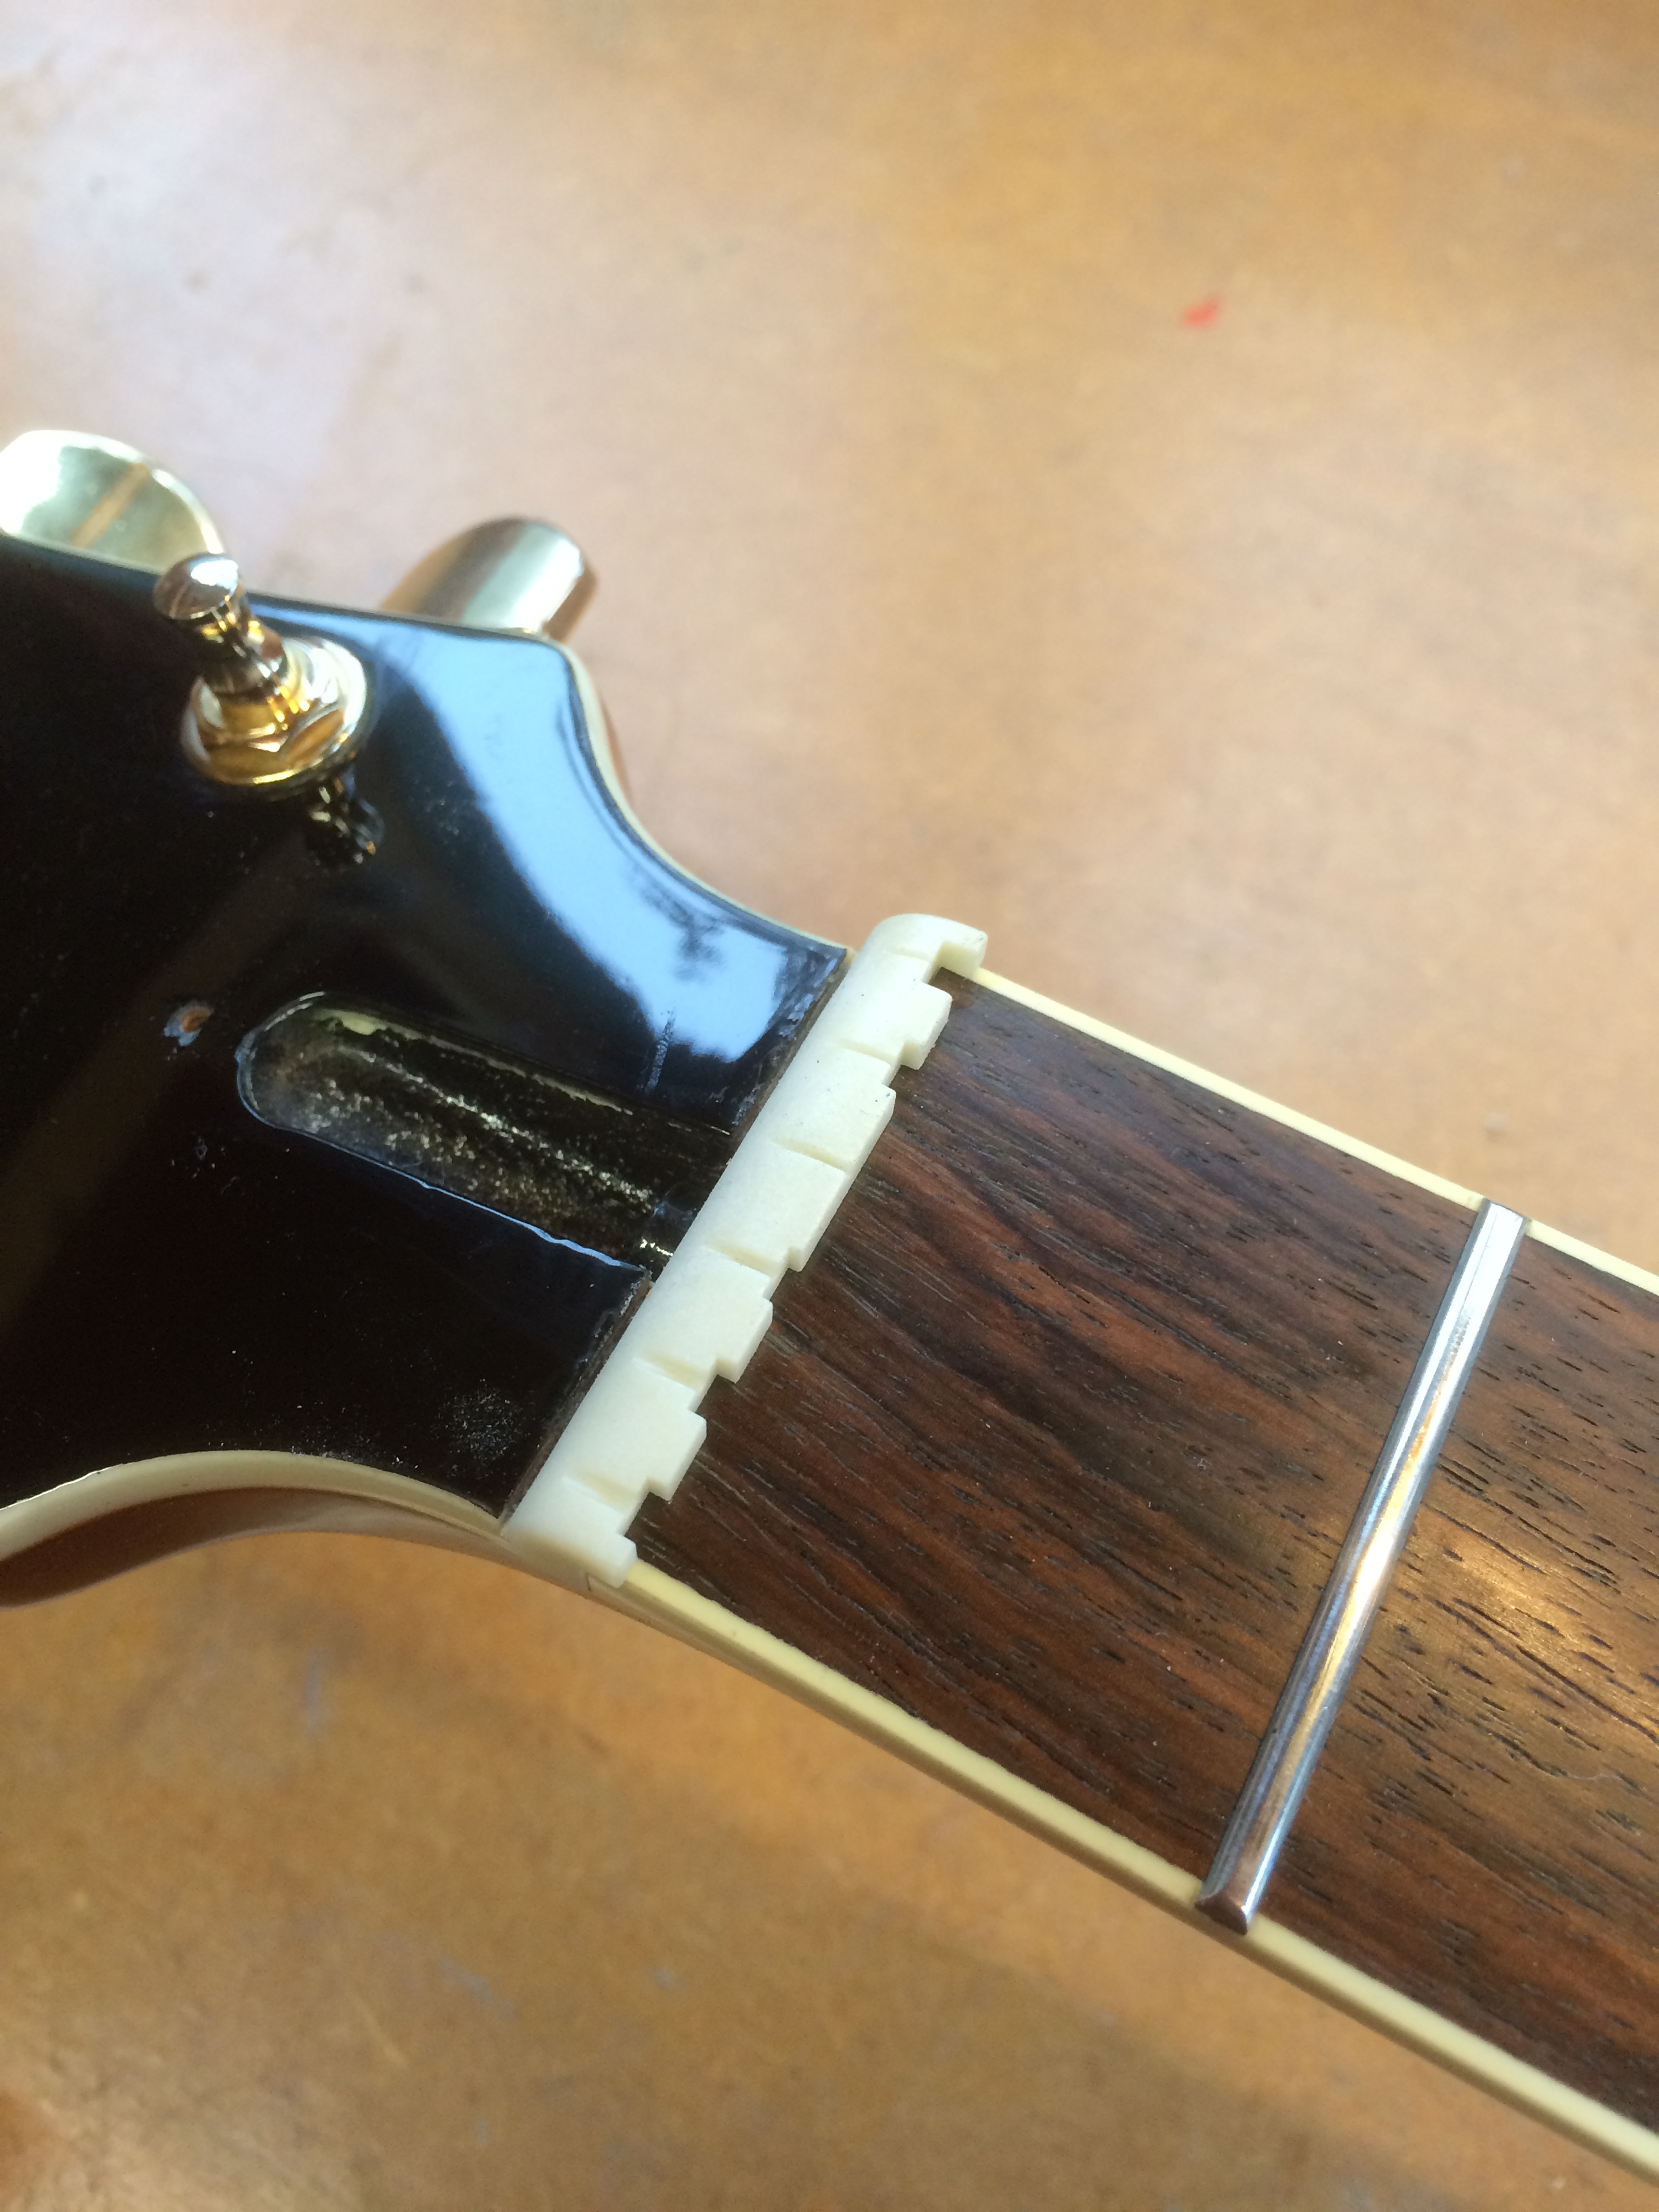
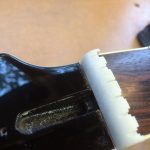
Here I’ve dressed it back to the width of the neck, taken quite a bit off the height and reshaped it to look nice. A quick polish with Micromesh and it’s good to go. Check out how nicely seated the fret is – that’s stock from the factory with a quick polish by me. These Minarik guitars are very well made.
The nut slots at this point are at a ‘nominal’ depth. To finalise the setup I string the guitar with the gauge of strings the customer will be using, adjust the truss rod correctly and set the action at the bridge as close as I can to its final setting. I fettle the slot to exactly the right depth with the guitar in tune, lifting the string out of the groove each time.
I usually set the nut so that if the string is fretted at the third fret, I can slip a piece of paper between the string and the first fret. I actually like the nut a bit higher than the lowest possible – it’s very much a personal preference so I check what the customer wants.
A tiny bit of graphite from a pencil helps the string slip through the nut slots.
If it’s a new guitar, it usually moves about for a few days after being strung for the first time. I’ll revisit it a few times and readjust until it settles. By this time the strings are usually knackered after being stretched and pulled about so I fit new ones.